
How to make a seashell mirror Shellman style
A shell mirror is a frame covered in shells, with a mirror in the middle. Some call it a seashell frame. It's the same craft, and the one we've spent years on at the studio table.
The best way to learn it is to watch. In the video below, Buster takes you through a whole mirror, step by step. The short guide underneath sums up the steps and our best tips, so you can keep it open while you work.


The easy way: our DIY kit
Our DIY shell mirror kit has everything for a 40 × 50 cm mirror: about 40 kinds of shells sorted in numbered bags, a pre-cut and pre-painted wooden frame with mirror glass, a back piece, screws, glue, sealant and hanging hardware. Plus written instructions and this video. No prep, no paint: you go straight to the fun part.
What you need if you start from scratch
- A wooden frame and mirror glass. Paint the frame roughly the color of most of your shells, so small gaps disappear. White, gray or black is usually enough.
- Lots of shells in many sizes. Clean beach shells thoroughly, boil them if needed, and let them dry.
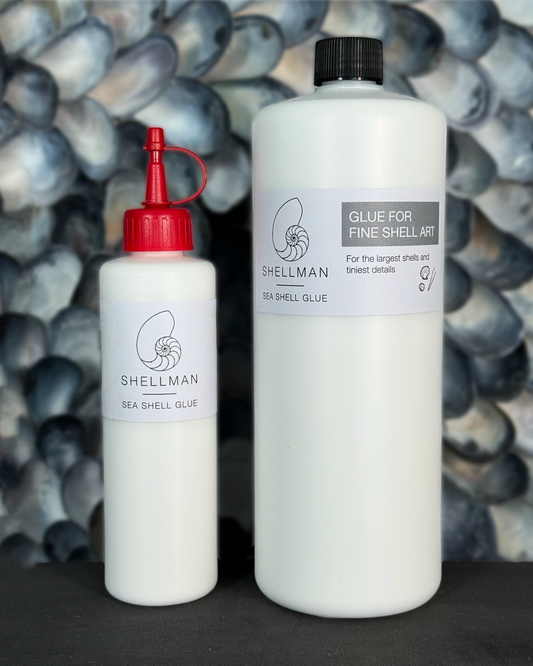
- Glue made for shells. We use our own Shellman Sea Shell Glue on almost every piece. It dries transparent, has no toxic fumes and washes off easily while you work. For indoor use.
- Sand and a few tools: tweezers, something long and pointy, a small brush, a spoon and a jar of water.

The steps in short
- 1
Set up
Choose a work table that's kind to your back, with good light. Sort the shells by size: big, medium, small, tiny.
- 2
Edges first
Stand the frame on its edge and glue shells along the outer and inner edges, one side at a time. Dry-fit them first, so they fill the edge and the sides meet nicely at the corners. That goes for rectangular, round and oval frames alike. Nothing may stick out over the back or over the inner ledge where the mirror rests. Spoon sand into the gaps to hide the frame.
- 3
Sketch it dry
Lay the frame flat and lay out the big shells without glue: corners first, then the upper and lower center. Think mix, balance and flow, not exact symmetry. Take a photo: it shows the balance better than the real frame.
- 4
Big shells
Glue them with a generous bead of glue around the rim, the top of the frame (the head piece) first. Let it dry overnight.
- 5
Medium and small shells
Layer them on and between the big ones, on top or half-hidden. Dip the small ones in a jar of glue so they get glue on all sides. Try clusters of one kind, a few abalone for shine, and cones and strombus for the head piece.
- 6
Tiny shells and sand
The tiny "fillers" hide the frame from every angle. Glue a small area, pour tiny shells over it, let it dry, then fill the gaps one by one. Sand last. This is where your patience is put to the test: expect a few hours.
- 7
Shake, check, fill
Shake off anything loose and fill the gaps it leaves.
- 8
Mirror and hanging
Turn the frame front side down on something soft. Put the mirror in with an equal gap all around, apply sealant in the gaps and let it dry for at least 30 minutes. Then the back piece and the hangers. For the wall, use the plug and screw that suit yours.
Small shells sit hard after 20–30 minutes, very large and heavy ones need 48 hours. The mirror in the video took about 30 hours, so take your time. Every step is shown in the video.


Our best tips
Broken is beautiful
A damaged shell? Show its other side, or hide the flaw under another shell.
Step back often
Or climb a chair and look down at the frame, as if it were already on the wall.
Be generous with glue early, careful late
Early glue gets covered. At the end, none should show.
Let some shells show their opening
Many look even better upside down.
Placed one wrong?
Once dry the glue sits hard, but you can pry a shell off and glue it again.
Ready to start?
Watch the video, then get a DIY shell mirror kit and make your own Shellman mirror. Already have shells? Pick up the glue we use. We ship from Helsingborg, Sweden.
FAQ
What glue should I use for shells on wood?
The best glue to create seashell art with is the Shellman Sea Shell Glue. It's made for gluing shells to a frame and to other shells, and once cured the shells sit like a rock.
How do you glue shells to wood?
Lay the wood flat and sketch your design with loose shells first. Then glue in stages: big shells first with a generous bead of glue around the rim, then smaller shells on top, then tiny shells and sand for the gaps. Let each stage dry before the next.
How long does a shell mirror take to dry?
With Shellman Sea Shell Glue, small shells normally sit hard enough after 20–30 minutes. Very large, heavy shells need 48 hours. Keep the frame flat while it dries.
What size is a DIY shell mirror kit?
Our DIY kits make a 40 × 50 cm shell mirror. Each one comes with about 40 kinds of shells, the frame base, the mirror glass, a back piece, screws, glue, sealant and hanging hardware, plus written and video instructions.
How much glue do I need for a shell mirror?
A Starter pack plus a 1L Refill is enough for about three frames of 40 × 50 cm with a 9 cm frame width.
Can I hang a shell mirror outside?
The Shellman Sea Shell Glue is for indoor use. Contact us if you would like an outdoor piece made.
Let customers speak for us
Easy to use and very forgiving as it dries clear. Enjoying working with it. Thank you

Perfect for both small and big projects. Very long lasting.
It doesn’t leave any marks and is solid! Luv it! I use it for all kinds of projects.
Got an extra bottle of this for other crafty projects around the house. Specifically like it for creating miniatures. Way better than the original Noch glue.
Amazing glue! Easy to use and dries quickly, its rock solid.
A few things to help you on your way
-
 Sold out
DIY Shell Mirror Craft Kit No. 2
Regular price €225 EURRegular priceUnit price per -
 Sold out
Sea Shell Glue
Regular price From €45 EURRegular priceUnit price per -
 Sold out
DIY Shell Mirror Craft Kit No. 1
Regular price €300 EURRegular priceUnit price per

